How to configure SAML single sign-on (SSO) in Otter.ai


SAML-based single sign-on (SSO) gives members access to Otter through an identity provider (IDP) of your choice.
Otter supports
• Identity Provider (IdP) Initiated Flow
• Service Provider (SP) Initiated Flow
• Just-in-time (JIT) provisioning. An Otter account is created on-the-fly according to the SAML attributes when users log in to Otter via IdP-initiated login.
• Assertion and NameID Encryption
• Session duration configured in your IdP
Who can use this feature
• Available to Otter for Enterprise plan (100 seats minimum) only
• Only the admin can configure SSO for the team. Once configured, SSO is available for use for every team member.
If your organization uses Okta as the identity provider, please read the setup guide here. Otherwise, please continue.
Step 1: Configure your identity provider
Before you start: know your Team Handle
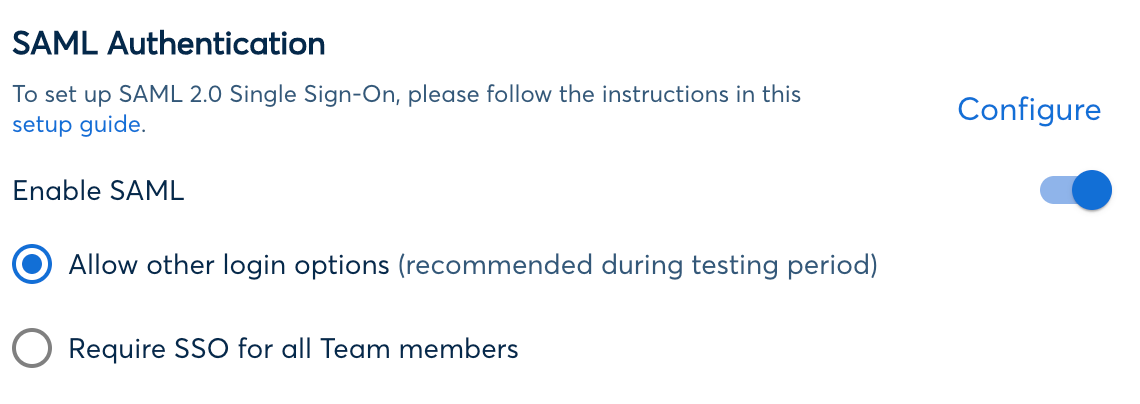
On Otter.ai Team Settings page, choose "Settings & Security" tab, locate "SAML Authentication", and click "Configure". You can find your team handle at the top of the popup dialogue.

Single Sign On URL
Also known as “SSO post-back URL”, “Assertion Consumer Service URL”, “ACS URL”
Entity ID
Also known as “Audience”
NameID
NameID must be unique, pseudo-random, and will not change for the user over time — like an employee ID number. The NameID Format must be “persistent”
Attributes
Otter supports the following SAML Attribute formats:
first_name: (required) the user’s first name
or
last_name: (required) the user’s last name
or
email: (required) the user’s email address
or
or
SAML Metadata
If your IdP asks for SAML metadata XML file during setup, it can be downloaded at
Step 2: Set up SAML SSO for Otter
- Visit https://otter.ai/manage-team/team-settings
- In Privacy & Security tab, find SAML Authentication. Click “Configure”.
- Enter your SAML Endpoint URL (this came from setting up your identity provider earlier.) This is where authentication requests from Otter will be sent.
- Enter your Identity Provider Issuer URL (also known as the IdP Entity ID).
- Copy the entire x.509 Public Certificate from your identity provider.
- (Optional) In advanced settings, you can choose to sign AnthNRequest. You can also choose to require SAML Assertion and NameID encryption. Make sure the configuration in your IdP matches the selections in Otter.
- To save changes, click “Save and Test”. A test authentication will be attempted to verify your configuration.
- You can enable SSO for your team once the above test passes. Upon enabling, SSO is optional, and other sign-in methods are still allowed. This is recommended during testing period to ensure your team members have an uninterrupted experience.
- When it's ready, remember to change to require SSO for all team members, so as to prevent members from using other sign-in methods.

If you encounter problems during the setup, please contact support@otter.ai for help.

Related posts


.png)

.png)


