
Learn essential tips for internet video conferencing from home, including setup, etiquette, and key technical considerations for better virtual meetings.
Chang Chen
August 4, 2020


Webinars have become essential to the modern workplace. They differ from video conferences in that they serve as a means of participation, allowing equal interaction between a single presenter and a large group of participants. Webinars allow many more attendees to join in live events no matter where they are.
Thanks to their outreach webinars are better at capturing the sense of an event for marketing, product demonstrations, training, and other interactive knowledge sharing demonstrations in ways video conferencing cannot.
Webinars are a low-cost method of engaging with a vast number of people and exchanging questions and feedback with them in real time. Having the ability to connect with a large audience at any time opens up numerous possibilities for training your employees, educating your clients, and promoting your brand.
This guide on how to host a webinar will help you to avoid some of the most common issues including:
To ensure you provide a professional live event with a large audience, a simple webinar format, relevant and helpful content, and an engaging presentation, consider the following points before getting started!
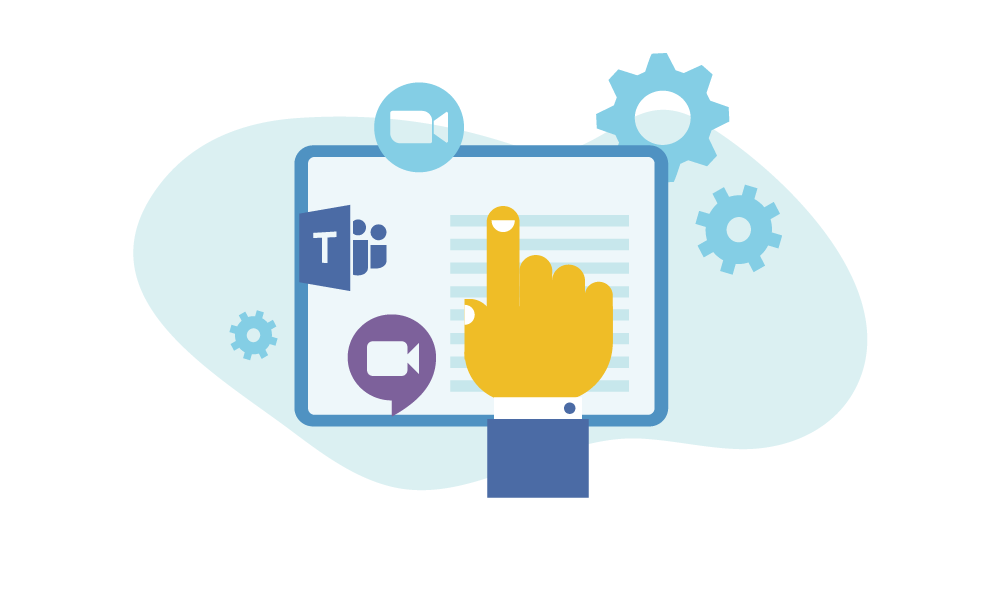
There are many different options out there for your webinar. The growth of video conferencing has brought an abundance of choices. The decision of which webinar software works best for you should be based on your needs. Common, relevant features include:
With a decent internet connection and a relatively simple setup, most modern video conferencing services will do a good job for webinars. Some workplaces use a specific video conferencing system, such as Microsoft Teams, Google Meet, or Zoom.
Choose the webinar software that makes sense for you and get familiar with it. Get your invites sent out early to avoid teething problems when colleagues and team members try to log on. Make sure that all attendants have a link and any passwords or specific login instructions well before the meeting is due to start.
You may have to decide between free and paid versions of the software. Zoom, for example, allows one-on-one meetings for free, but meetings of more than two people are time-limited. It doesn’t look professional if Zoom cuts your webinar off prematurely. Paid versions of software add more features, such as cloud recordings and a custom vanity URL.
Let’s take a look at some advantages and disadvantages of the most widely used webinar platforms:
Zoom
Pros:
Cons:
Microsoft Teams
Pros:
Cons:
Google Meet
Pros:
Cons:
When you take the time and effort to host a webinar, you should ensure that you get as many attendees as possible.
Firstly, make use of the existing network. If you have built up a mailing list or large social media following, encourage webinar registrations by sending notifications explaining why they should check out the webinar and how they can access the webinar. Update your social media, and even add an event page and invite people.
In addition to sending invites to social media and the email addresses of potential attendees, you can use advertising to reach a new audience. Running ads on Facebook or Google, for example, will allow you to audience and reach those who will be most interested.
The better you understand your audience, the more powerful your presentation will be. Here are the factors to consider when thinking about your audience:
Now that you have a better understanding of your audience, ensure you’re presenting content that resonates with it. Include data,metrics and statistics that are relevant to your audience in the context that they can easily grasp and relate to. Use real-life examples to make your presentation more impressive and memorable.
To connect with your audience on a deeper level, use visualizations to create vivid images that will stick in their memory and help them better understand your message.
Avoid acronyms and industry jargon or explain them before using them. Audiences feel more engaged when they are spoken to in a simple, literal way, and clear and straightforward language will help prevent confusion and allow for a more effective flow of communication.
According to GoToWebinar, the best days to run your webinar are Wednesdays and Thursdays, and the best times to run a webinar are 11 am and 2 pm, as you are more likely to get a higher attendance around lunch hours. Remember to consider your audience’s time zones when scheduling your webinar. In some industries, or if your audience is international, you might need to break these rules.
Invites sent to potential webinar attendees should be sparse. The accepted wisdom of the industry is to send reminders at three times:
When preparing the invites, make sure that your instructions on how to join the webinar are clear and simple. There should be no barriers to entry for the webinar. Microsoft Teams will provide you with a link that can be sent for people to attend within their browser. This is extremely simple and straightforward. Zoom has a similar function, though it encourages everyone to sign up for an account.
Take advantage of the function of webinar hosting websites to send out the invitation early. Get a friend to test the link, so you don't send a broken link to customers.
Most modern laptops will do a pretty good job of running a video conferencing app, and their inbuilt microphones and cameras are passable. But sometimes, additional equipment could be required.
If you want to add a more professional feel to your videos, think about enhancing this equipment and adding some external webinar gear.
There is a school of thought that you shouldn't use the inbuilt laptop camera. A separate webcam falls under the "webinars best practices" category. It gives you a lot more options when it comes to positioning. Test your inbuilt camera in a room with plenty of light. If it is grainy and low quality or only provides an unflattering angle, an HD webcam might be a good purchase.
In short, no, you don’t need to be on camera for a webinar. You can host a webinar using your voice alone. However, some people might find this approach a little disorienting. It can also make you seem less approachable, which could result in fewer attendees engaging with you.
Instead, try to be on camera for your webinar so that people can feel like they're having a face-to-face interaction, even if you’re thousands of miles apart. If you can’t be on camera, make sure that you have a professional-looking profile picture in Zoom or the video calling platform of your choosing. This way, your webinar attendees can put a face with your voice.
There are three main options when it comes to a microphone for your webinar:
If you regularly use Skype or voice chat functions on your computer, you may have some idea of the quality of its inbuilt microphone. It might be good enough to create and record your own webinar, but it won't sound as professional as an external mic. An external mic can help to eliminate background noise, and it will usually provide a significant upgrade to the sound quality.
External wired microphones are popular for webcams if you are not moving around too much. USB microphones are popular, and they are usually a significant upgrade from the sound of your inbuilt mic. If you want to use an "XLR" microphone, be sure that you buy an audio interface, as this is needed for the computer to communicate with the mic.
Wireless external microphones are definitely the most complex to set up. You will need to use a wireless receiver connected to your computer. However, if you are standing during the webinar, a wireless lavalier mic gives much more flexibility to move around.
Your face should be clearly visible. The best way to do this is usually to have your face pointing towards the brightest light source possible.
The light source should be behind the camera, not behind you. A light behind you gives a silhouette effect. Use natural light from a window or alternatively a lamp or professional lighting kit. Try to use just one source of light, and don't mix natural and artificial light.
If you’d like to use a lamp, you can gain more control by purchasing one that has multiple "smart" settings, such as control over brightness and color temperatures. Tweak these settings when testing to ensure a clear and natural look.
If you would like to learn more, The Verge’s tips for lighting in video calls translate perfectly to webinars, too.
Appearance refers to both yourself and your background. Simple and neutral is the key to both. Something like a simple black shirt is a basic option that will be inoffensive and avoid detracting from the message of the webinar.
Think about what is in the background of your video. A plain and neutral background should be sourced. This can be as simple as a wall behind you. Alternatively, positioning yourself in front of a white board can make for an engaging presentation, but make sure you’re coordinated enough to write, draw and speak at the same time.
Depending on the topic of your webinar and the strategies you believe to be most effective in engaging your audience, you may also want to demonstrate a series of slides as you present the topic. You can use a screen sharing feature to do this; get familiar with the interface of the webinar software you’re using upfront to easily toggle between video and screen sharing when needed. If you’re interested in the nuances of creating the best presentation slides for your webinar, use a dedicated tutorial.
Ensure you have your own private space, such as an office or studio, to conduct the webinar. Communicate with anyone else working or living with you that you will need silence and privacy.
If you are serious about webinar best practices, think about improving the acoustics of the room you will be using. Acoustic panels don't have to cost a lot (you can even make your own) but they can greatly optimize the sound quality within your room by absorbing sound that would normally reflect off walls and other surfaces, creating an echo.
In addition to external distractions, there are plenty of things within your network that can go wrong, such as notifications popping up or network failures. To stop interruptions from your computer itself:
Even if you’re confident that you know how to run a webinar, there is always some risk of something going wrong. That’s why it is a good idea to do a dry run to check that everything is in working order.
Testing involves checking the video and audio clarity, as well as the controls of the platform you are using. It can be done by hosting a quick call with a couple of colleagues or friends in the days before the webinar. Troubleshoot problems that you may not have foreseen.
If you are new to your webinar software, this can also be a great way to learn the controls. You can go through your webinar content with friends to ensure slides, screen shares, and other content can all be accessed.
Forming an agenda will guide you through all the points you need to make and ensure that nothing gets left out. Even if you don't end up referring to it, it is a good idea to keep an agenda by your side. If you find public speaking tough, an agenda is a fantastic failsafe. If you get tongue-tied and start to feel lost, you can refer back to the structure you planned.
To prevent you from being interrupted during your meeting, you can set aside time for questions, Q&A, and even objections. Make this clear at the start, and ask people to write down or remember their questions to ask them later during the allocated time.
Most of the webinar tips we've provided in this guide are very simple to follow. Don't put pressure on yourself! Instead, just follow the simple rules above, ensure that your message is clear, and try to make the best of the equipment and abilities you have available to you. With a bit of consideration, anyone can run a successful webinar.
Webinars have become essential to the modern workplace. They differ from video conferences in that they serve as a means of participation, allowing equal interaction between a single presenter and a large group of participants. Webinars allow many more attendees to join in live events no matter where they are.
Thanks to their outreach webinars are better at capturing the sense of an event for marketing, product demonstrations, training, and other interactive knowledge sharing demonstrations in ways video conferencing cannot.
Webinars are a low-cost method of engaging with a vast number of people and exchanging questions and feedback with them in real time. Having the ability to connect with a large audience at any time opens up numerous possibilities for training your employees, educating your clients, and promoting your brand.
This guide on how to host a webinar will help you to avoid some of the most common issues including:
To ensure you provide a professional live event with a large audience, a simple webinar format, relevant and helpful content, and an engaging presentation, consider the following points before getting started!
There are many different options out there for your webinar. The growth of video conferencing has brought an abundance of choices. The decision of which webinar software works best for you should be based on your needs. Common, relevant features include:
With a decent internet connection and a relatively simple setup, most modern video conferencing services will do a good job for webinars. Some workplaces use a specific video conferencing system, such as Microsoft Teams, Google Meet, or Zoom.
Choose the webinar software that makes sense for you and get familiar with it. Get your invites sent out early to avoid teething problems when colleagues and team members try to log on. Make sure that all attendants have a link and any passwords or specific login instructions well before the meeting is due to start.
You may have to decide between free and paid versions of the software. Zoom, for example, allows one-on-one meetings for free, but meetings of more than two people are time-limited. It doesn’t look professional if Zoom cuts your webinar off prematurely. Paid versions of software add more features, such as cloud recordings and a custom vanity URL.
Let’s take a look at some advantages and disadvantages of the most widely used webinar platforms:
Zoom
Pros:
Cons:
Microsoft Teams
Pros:
Cons:
Google Meet
Pros:
Cons:
When you take the time and effort to host a webinar, you should ensure that you get as many attendees as possible.
Firstly, make use of the existing network. If you have built up a mailing list or large social media following, encourage webinar registrations by sending notifications explaining why they should check out the webinar and how they can access the webinar. Update your social media, and even add an event page and invite people.
In addition to sending invites to social media and the email addresses of potential attendees, you can use advertising to reach a new audience. Running ads on Facebook or Google, for example, will allow you to audience and reach those who will be most interested.
The better you understand your audience, the more powerful your presentation will be. Here are the factors to consider when thinking about your audience:
Now that you have a better understanding of your audience, ensure you’re presenting content that resonates with it. Include data,metrics and statistics that are relevant to your audience in the context that they can easily grasp and relate to. Use real-life examples to make your presentation more impressive and memorable.
To connect with your audience on a deeper level, use visualizations to create vivid images that will stick in their memory and help them better understand your message.
Avoid acronyms and industry jargon or explain them before using them. Audiences feel more engaged when they are spoken to in a simple, literal way, and clear and straightforward language will help prevent confusion and allow for a more effective flow of communication.
According to GoToWebinar, the best days to run your webinar are Wednesdays and Thursdays, and the best times to run a webinar are 11 am and 2 pm, as you are more likely to get a higher attendance around lunch hours. Remember to consider your audience’s time zones when scheduling your webinar. In some industries, or if your audience is international, you might need to break these rules.
Invites sent to potential webinar attendees should be sparse. The accepted wisdom of the industry is to send reminders at three times:
When preparing the invites, make sure that your instructions on how to join the webinar are clear and simple. There should be no barriers to entry for the webinar. Microsoft Teams will provide you with a link that can be sent for people to attend within their browser. This is extremely simple and straightforward. Zoom has a similar function, though it encourages everyone to sign up for an account.
Take advantage of the function of webinar hosting websites to send out the invitation early. Get a friend to test the link, so you don't send a broken link to customers.
Most modern laptops will do a pretty good job of running a video conferencing app, and their inbuilt microphones and cameras are passable. But sometimes, additional equipment could be required.
If you want to add a more professional feel to your videos, think about enhancing this equipment and adding some external webinar gear.
There is a school of thought that you shouldn't use the inbuilt laptop camera. A separate webcam falls under the "webinars best practices" category. It gives you a lot more options when it comes to positioning. Test your inbuilt camera in a room with plenty of light. If it is grainy and low quality or only provides an unflattering angle, an HD webcam might be a good purchase.
In short, no, you don’t need to be on camera for a webinar. You can host a webinar using your voice alone. However, some people might find this approach a little disorienting. It can also make you seem less approachable, which could result in fewer attendees engaging with you.
Instead, try to be on camera for your webinar so that people can feel like they're having a face-to-face interaction, even if you’re thousands of miles apart. If you can’t be on camera, make sure that you have a professional-looking profile picture in Zoom or the video calling platform of your choosing. This way, your webinar attendees can put a face with your voice.
There are three main options when it comes to a microphone for your webinar:
If you regularly use Skype or voice chat functions on your computer, you may have some idea of the quality of its inbuilt microphone. It might be good enough to create and record your own webinar, but it won't sound as professional as an external mic. An external mic can help to eliminate background noise, and it will usually provide a significant upgrade to the sound quality.
External wired microphones are popular for webcams if you are not moving around too much. USB microphones are popular, and they are usually a significant upgrade from the sound of your inbuilt mic. If you want to use an "XLR" microphone, be sure that you buy an audio interface, as this is needed for the computer to communicate with the mic.
Wireless external microphones are definitely the most complex to set up. You will need to use a wireless receiver connected to your computer. However, if you are standing during the webinar, a wireless lavalier mic gives much more flexibility to move around.
Your face should be clearly visible. The best way to do this is usually to have your face pointing towards the brightest light source possible.
The light source should be behind the camera, not behind you. A light behind you gives a silhouette effect. Use natural light from a window or alternatively a lamp or professional lighting kit. Try to use just one source of light, and don't mix natural and artificial light.
If you’d like to use a lamp, you can gain more control by purchasing one that has multiple "smart" settings, such as control over brightness and color temperatures. Tweak these settings when testing to ensure a clear and natural look.
If you would like to learn more, The Verge’s tips for lighting in video calls translate perfectly to webinars, too.
Appearance refers to both yourself and your background. Simple and neutral is the key to both. Something like a simple black shirt is a basic option that will be inoffensive and avoid detracting from the message of the webinar.
Think about what is in the background of your video. A plain and neutral background should be sourced. This can be as simple as a wall behind you. Alternatively, positioning yourself in front of a white board can make for an engaging presentation, but make sure you’re coordinated enough to write, draw and speak at the same time.
Depending on the topic of your webinar and the strategies you believe to be most effective in engaging your audience, you may also want to demonstrate a series of slides as you present the topic. You can use a screen sharing feature to do this; get familiar with the interface of the webinar software you’re using upfront to easily toggle between video and screen sharing when needed. If you’re interested in the nuances of creating the best presentation slides for your webinar, use a dedicated tutorial.
Ensure you have your own private space, such as an office or studio, to conduct the webinar. Communicate with anyone else working or living with you that you will need silence and privacy.
If you are serious about webinar best practices, think about improving the acoustics of the room you will be using. Acoustic panels don't have to cost a lot (you can even make your own) but they can greatly optimize the sound quality within your room by absorbing sound that would normally reflect off walls and other surfaces, creating an echo.
In addition to external distractions, there are plenty of things within your network that can go wrong, such as notifications popping up or network failures. To stop interruptions from your computer itself:
Even if you’re confident that you know how to run a webinar, there is always some risk of something going wrong. That’s why it is a good idea to do a dry run to check that everything is in working order.
Testing involves checking the video and audio clarity, as well as the controls of the platform you are using. It can be done by hosting a quick call with a couple of colleagues or friends in the days before the webinar. Troubleshoot problems that you may not have foreseen.
If you are new to your webinar software, this can also be a great way to learn the controls. You can go through your webinar content with friends to ensure slides, screen shares, and other content can all be accessed.
Forming an agenda will guide you through all the points you need to make and ensure that nothing gets left out. Even if you don't end up referring to it, it is a good idea to keep an agenda by your side. If you find public speaking tough, an agenda is a fantastic failsafe. If you get tongue-tied and start to feel lost, you can refer back to the structure you planned.
To prevent you from being interrupted during your meeting, you can set aside time for questions, Q&A, and even objections. Make this clear at the start, and ask people to write down or remember their questions to ask them later during the allocated time.
Most of the webinar tips we've provided in this guide are very simple to follow. Don't put pressure on yourself! Instead, just follow the simple rules above, ensure that your message is clear, and try to make the best of the equipment and abilities you have available to you. With a bit of consideration, anyone can run a successful webinar.


